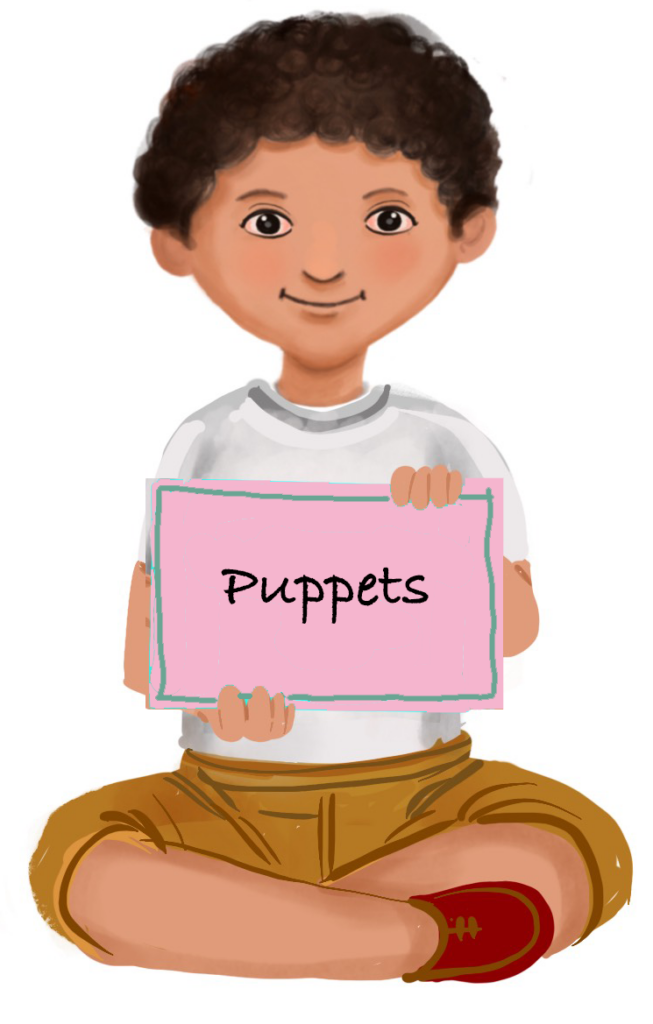
Rooster
 Objective
To help teachers create a puppet of a rooster for story-telling and other purposes.
Estimated time to create the Glove Puppet – Rooster
1 to 1.5 hours
Materials required for creating the Glove Puppet – Rooster
- a clean white cotton glove
- colourful felt sheets (orange, red, brown, yellow, green)
- scissors
- glue (glue drops, fabric glue or hot glue gun)
- black marker or small googly eyes
- pencil and eraser (for sketching shapes)
- cardboard or thick paper (optional for reinforcement)
- thread and needle (optional, for more secure attachments)
Preparation for activity
- Choose child-safe and durable materials (felt, foam, cloth, etc.).
- Ensure the glove fits well on the hand.
- Select bright, friendly colors to attract children’s attention.
- Sketch a rooster’s head, tail and wing on paper or mentally visualize it.
- Pre-cut felt pieces (tail feathers, beak, comb, wattle, wing) for quicker assembly.
- Prepare a sample puppet as a reference.
- If you are using hot glue instead of Fevicol, ensure that the hot glue is heated suitably and is ready for use.
- Use child-safe scissors if children are involved.
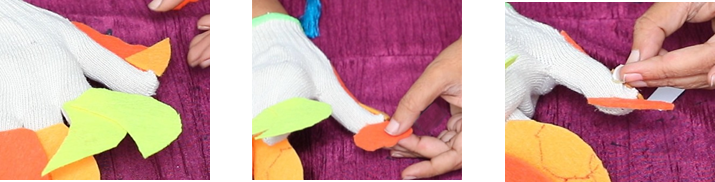
Procedure
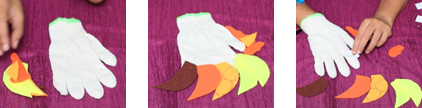
- Cut Felt Pieces:
- Cut 5-6 colourful tail feathers from different felt sheets.
- Cut a comb (red/orange), beak (yellow/orange) and a wattle (red).
- Prepare the Glove:
- Turn the glove so that the thumb is on the side (used for the rooster’s head).
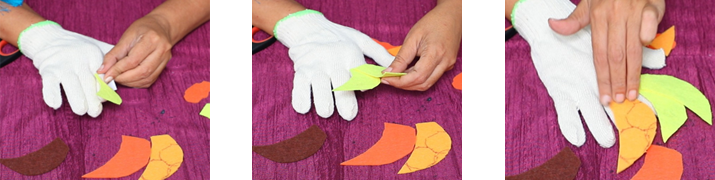
- Attach Tail Feathers:
- Glue the feathers onto the back side of the glove’s fingers.
- Overlap them slightly for a fuller look.
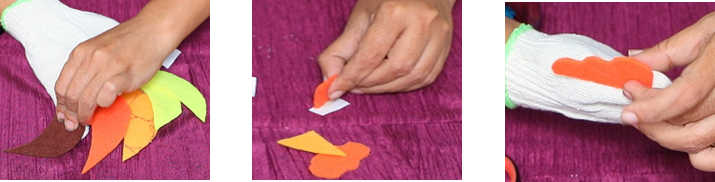
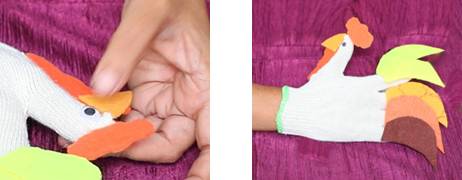
- Attach Head Features:
- Attach the beak and wattle below it.
- Glue the comb on top of the glove’s thumb.
- Stick a googly eye or draw an eye using a black marker. The glove rooster puppet is ready.
- Let it Dry:
- Allow the glue to dry completely before wearing.
- Slip your hand inside and wiggle the thumb and fingers to animate the rooster.
Step by Step Pictures to create the puppet
Important Tips
- Use bright colours to keep it visually engaging.
- Test fit the glove on the hand before gluing, to ensure proper placement.
- Use fabric glue for better adhesion to fabric materials.
- Reinforce felt pieces with cardboard if they flop or lack shape.
- Use non-toxic glue and materials especially if children handle the puppet.
- Keep it lightweight for easy hand movement.
- While creating the puppet, replicate the character illustration given in the children’s textbook. Once the puppet is ready, use the character’s name from the textbook. Using the name in the textbook, helps children to remember the content.
- The teacher should use the puppet at an appropriate time. The teacher can narrate the story in a humorous manner. The teacher may make intentional mistakes to encourage children to correct them, thereby helping them become more actively engaged.
Precautions
- Always keep the face of the puppet towards the audience.
- Avoid overloading the glove with too many elements; it may become uncomfortable.
- Allow glue to dry fully before using the puppet to avoid smearing.
Troubleshooting:
- If the puppet (glove) feels too tight, use a larger glove or stretch the base fabric.
- If the parts are falling off, use stronger glue or secure them with thread stitches.
- If the eyes or small parts are detaching, replace with marker drawings or stitch into place.
 Notes to the Teacher
- Using puppets also aids in developing motor skills, such as hand-eye coordination. Additionally, puppets can enhance communication and social skills, improve focus and concentration and help teach concepts and values.
- Use this puppet to introduce topics like farm animals, sounds animals make or storytelling.
- Encourage children to make their own puppets to build creativity and motor skills.
- Consider preparing a whole set (cow, duck, pig) for a farm-animal puppet show.
Using the Learning Teaching Material
The teacher can conduct a ‘Puppet Show’. Teachers can encourage the students to create these puppets and have a ‘Puppet Show’ in the classroom.
Video: How to use Learning Teaching Material
| Source and Attribution of images All images used in the above Assets and Aids are originally created. |
| This digital material has been developed by the Sri Sathya Sai Vidya Vahini Inclusive Education Project, a unit of Sri Sathya Sai Central Trust, Prasanthi Nilayam, as a collaborative offering in the service of our nation. |