Lion
 Objective
To guide teachers in creating a Lion Rod Puppet that can be used in classrooms for storytelling, rhymes and activity-based learning.
Estimated time to create the Lion Puppet
20–30 minutes
Materials required for creating the Lion Puppet
- Yellow chart paper or thick A4 sheet
- Orange chart paper
- Black sketch pen
- Pencil and eraser
- Glue drops or Fevicol
- Tape
- Scissors
- Two thin wooden or plastic rods/straws
- Googly eyes (optional)
- Pins to affix legs to the body, face to the body (split pins)
Preparation for activity
- Keep all materials arranged neatly on the workspace.
- Pre-cut the coloured chart paper into small pieces for ease of assembly.
- Ensure rods or straws are of equal length for balanced puppet control.
- Use child-safe scissors if children are participating.
Procedure
Hello everyone! Welcome to this puppet-making session. Today, we will make a strong and expressive Lion Rod Puppet that can be used for classroom storytelling, rhymes, and dramatisation.
- Step 1:
- On a white chart paper, draw the outline of a lion’s head, body, legs and tail. Use yellow or light brown chart paper for the body and darker shades for the mane.
- Step 2:
- Draw and cut a circular mane using brown or orange chart paper. Add zig-zag edges to give a realistic mane effect.
- Step 3:
- Carefully cut out all parts of the lion. Label the pieces if you are preparing this as a demonstration model.
- Step 4:
- Paste the facial features – eyes, nose, whiskers and mouth. You may use googly eyes or draw the eyes using a sketch pen.
- Step 5:
- Paste the mane behind the lion’s face. Attach the tail to the back of the body.
- Step 6:
- Fix two rods-one behind the head and one behind the lower body. Ensure the rods are firmly pasted and allow them to dry completely.
- Step 7:
- Hold the rods and gently move the puppet to show walking, roaring or nodding actions.
Now your Lion Rod Puppet is ready to roar into your classroom activities!
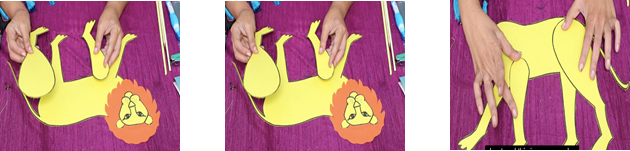
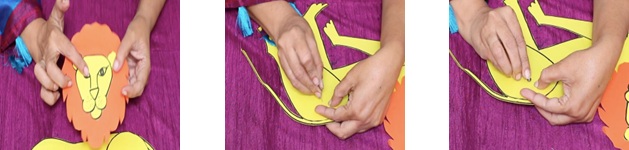
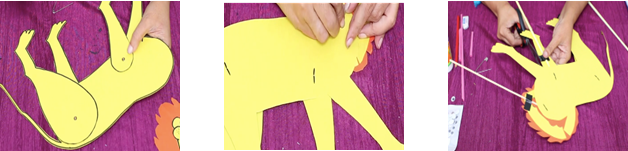
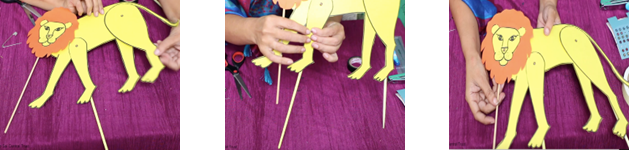
Step by Step Pictures to create the puppet
Important Tips
- Use thick chart paper to make the puppet durable.
- Keep facial expressions bold and clear for visibility.
- Practice puppet movements before classroom use.
- Lamination can increase longevity if required.
Precautions
- Use glue sparingly to prevent wrinkling.
- Ensure rods are securely fixed and not sharp.
- Keep the puppet’s face towards the audience during use.
- Always supervise children while handling scissors or sticks.
Troubleshooting:
- Problem: Puppet does not balance well.
- Solution: Reposition rods and allow glue to dry fully.
- Problem: Mane or facial parts come off.
- Solution: Reinforce with extra glue and press firmly.
- Problem: Puppet bends easily.
- Solution: Use thicker paper or double-layer the body.
 Notes to the Teacher
Puppet-making enhances creativity, fine motor skills and using expressive language. The Lion Puppet is ideal for representing strength, leadership and courage in stories and discussions. Children enjoy role play and gain confidence through puppet performances.
Different ways of using the puppet in class
- Storytelling: The Lion and the Mouse, Jungle Stories
- Language Development: Adjectives, action words, dialogue practice
- Value Education: Kindness, bravery, friendship
- Maths: Counting stories, sequencing events
- EVS: Wild animals, habitats, food chains
Encourage students to make their own puppets and perform short skits in groups.
Video: How to use Learning Teaching Material
| Source and Attribution of images All images used in the above Assets and Aids are originally created. |
| This digital material has been developed by the Sri Sathya Sai Vidya Vahini Inclusive Education Project, a unit of Sri Sathya Sai Central Trust, Prasanthi Nilayam, as a collaborative offering in the service of our nation. |