
Grill Box
 Objective
To guide teachers in creating a ‘Grill Box’ for improving memory skills in children.
Estimated time to create the grill box
30 to 40 minutes
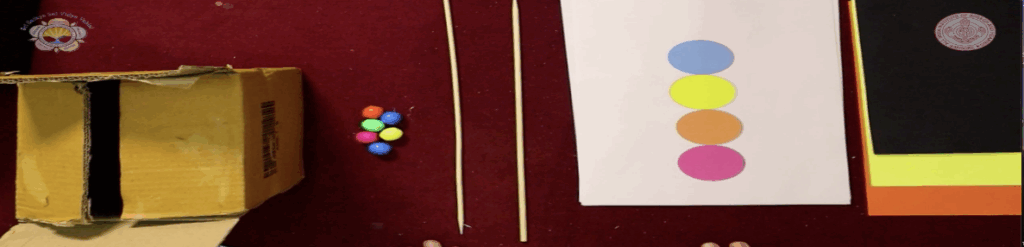
Materials required for creating the grill box
- Medium-sized cardboard box (shoe box or packaging box)
- Black chart paper
- Orange and yellow coloured paper (for flames)
- Fevicol or glue gun
- Scissors/cutter
- White and coloured sketch pens
- Small wooden (bamboo) sticks or straws (for skewers)
- Coloured beads
- Print outs of coloured circles (one, two and many colours)
Preparation for activity
- Ensure all craft materials are ready before starting.
- If using a cutter, supervise carefully or pre-cut cardboard sections for children.
- Keep reference pictures in the form of print outs of coloured circles ready.
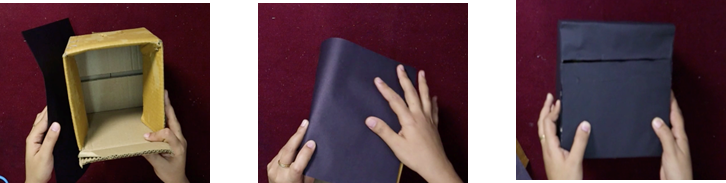
Procedure
- Base Structure:
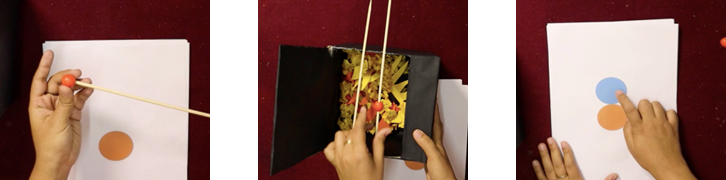
- Take a cardboard box and cut out a rectangular opening on the top surface. This will serve as the grill area.
- Grill Surface:
- Cover the outer surface of the cardboard box with thick black paper.
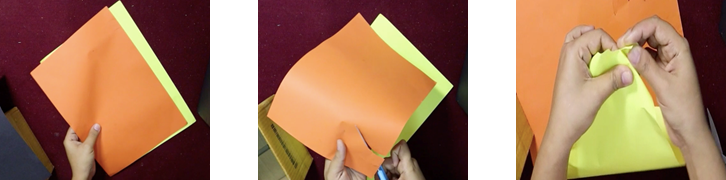
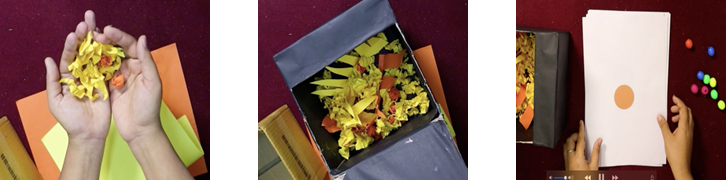
- Fire Bed:
- Inside the box, stick orange and yellow colour paper to resemble flames. Add small scrunched-up balls of yellow and orange paper bits and black chart paper bits to look like charcoal.
- Skewers:
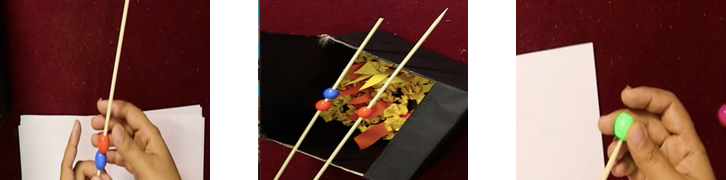
- Create two cuts on the top surfaces to place the skewers. Place the bamboo sticks as skewers.
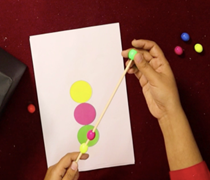
- Show the print out with one coloured circle to the child.
- Ask the child to pick the correct colour bead and insert the skewer into it.
- Continue this activity with two colours by showing a print out with two coloured circles and follow it up with many coloured circles.
Step by Step Pictures to create the Learning Teaching Material
Important Tips
- Use strong cardboard to make the grill durable.
- Instead of aluminium foil, silver gift wrapping paper can also be used.
- Encourage children to decorate the box with chalk or sketch pen designs.
- The grill box can be adapted for themes like ‘community helpers’ (chef, vendor), ‘safety’ (talking about fire), or ‘festivals’ (barbecue night).
Precautions
- Ensure children do not use real fire, candles or hot objects with the grill box.
- While cutting cardboard, handle the scissors/cutter carefully.
- Avoid using small detachable items that can be a choking hazard for younger children.
Troubleshooting:
- If the aluminium foil surface gets torn, replace it with a new sheet.
- Loose cellophane flames can be stapled or taped inside the box securely.
- If the grill box loses shape, reinforce with extra cardboard strips inside.
 Notes to the Teacher
The Grill Box can be used as:
- A storytelling prop (e.g. chef character, cooking scenes).
- A role-play tool for community helpers (restaurant, street vendor).
- A concept aid to discuss safety, cooking methods, or healthy food choices. It encourages imaginative play, social interaction and vocabulary building.
Using the Learning Teaching Material
Teachers can first demonstrate a pretend cooking scene.
Students can then take turns role-playing as chefs or customers, enhancing creativity and communication.
The activity can be extended into group projects where children make paper ‘food items’ to grill.
Video: How to use Learning Teaching Material
| Source and Attribution of images All images used in the above Assets and Aids are originally created. |
| This digital material has been developed by the Sri Sathya Sai Vidya Vahini Inclusive Education Project, a unit of Sri Sathya Sai Central Trust, Prasanthi Nilayam, as a collaborative offering in the service of our nation. |